
How to Repair a Leaking Gate Valve Effectively
Introduction
Gate valves are essential components in plumbing and industrial systems, controlling the flow of liquids by raising or lowering a gate mechanism. Over time, these valves may develop leaks due to wear and tear, corrosion, or improper installation. A leaking gate valve can lead to water wastage, reduced system efficiency, and even structural damage if left unattended.
This guide provides a comprehensive, step-by-step approach to effectively repairing a leaking gate valve. Whether the leak is from the stem, bonnet, or seat, proper diagnosis and repair techniques can restore functionality without requiring a full replacement.
---
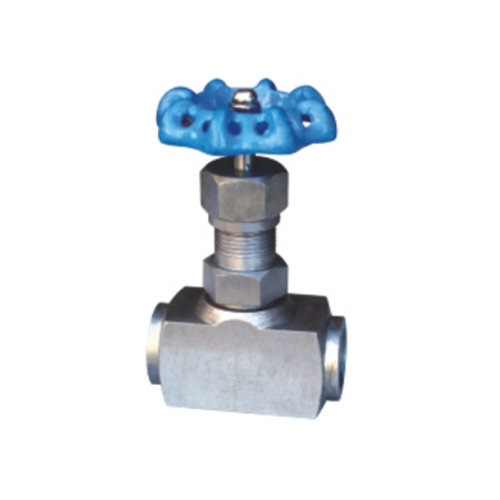
1. Understanding Gate Valve Components
Before attempting repairs, it’s crucial to understand the key components of a gate valve:
- Body: The main housing that contains the internal parts.
- Bonnet: The cover that seals the valve body and holds the stem.
- Stem: The threaded rod that moves the gate up and down.
- Gate: The disc that blocks or allows flow when raised or lowered.
- Seat: The sealing surface where the gate rests when closed.
- Packing: A sealing material around the stem to prevent leaks.
- Handwheel: The manual control used to open or close the valve.
Leaks typically occur at:
- Stem area (due to worn packing)
- Bonnet joint (due to loose bolts or gasket failure)
- Seat or gate (due to corrosion or damage)
---
2. Safety Precautions
Before starting any repair work:
- Turn off the water supply to prevent accidental flooding.
- Relieve system pressure by opening downstream faucets.
- Wear protective gear (gloves, goggles) to avoid injury.
- Ensure proper ventilation if working with chemical sealants.
---
3. Diagnosing the Leak Source
A. Stem Leak
- Symptoms: Water dripping from around the stem when the valve is closed.
- Cause: Worn-out or degraded packing material.
B. Bonnet Leak
- Symptoms: Water seeping from the joint between the bonnet and body.
- Cause: Loose bolts, damaged gasket, or corrosion.
C. Seat or Gate Leak
- Symptoms: Water passing through even when the valve is fully closed.
- Cause: Corrosion, debris, or misalignment of the gate.
---
4. Tools and Materials Needed
- Adjustable wrench
- Pipe wrench
- Screwdrivers
- Pliers
- Valve grease or Teflon tape
- Replacement packing (graphite or PTFE)
- Gasket material (if needed)
- Wire brush or emery cloth
- Penetrating oil (for stuck valves)
- Bucket and rags (for cleanup)
---
5. Step-by-Step Repair Procedures
A. Fixing a Stem Leak (Packing Replacement)
1. Turn off the water supply and drain residual pressure.
2. Remove the handwheel by unscrewing the retaining nut.
3. Loosen the packing nut using an adjustable wrench.
4. Extract the old packing with pliers or a screwdriver.
5. Clean the stem with a wire brush to remove debris.
6. Wrap new packing material around the stem (graphite or PTFE).
7. Tighten the packing nut gradually to compress the new packing.
8. Reassemble the handwheel and test for leaks.
B. Repairing a Bonnet Leak
1. Shut off the water supply and drain the system.
2. Loosen and remove bonnet bolts carefully.
3. Inspect the gasket for damage or wear.
4. Clean the sealing surfaces with a wire brush.
5. Replace the gasket if necessary (cut a new one if needed).
6. Apply valve grease to the new gasket for better sealing.
7. Reassemble the bonnet and tighten bolts evenly in a crisscross pattern.
8. Test for leaks after restoring water flow.
C. Fixing a Seat or Gate Leak
1. Close the valve fully and check for persistent flow.
2. Disassemble the valve by removing the bonnet.
3. Inspect the gate and seat for corrosion, debris, or damage.
4. Clean the gate and seat with a wire brush or emery cloth.
5. Lap the gate and seat (if necessary) using valve grinding compound.
6. Reassemble the valve and test for proper sealing.
---
6. Preventive Maintenance Tips
To extend the lifespan of gate valves:
- Operate valves periodically to prevent sticking.
- Lubricate stems and threads with valve grease.
- Avoid over-tightening, which can damage seals.
- Install strainers to prevent debris buildup.
- Check for leaks regularly and address them early.
---
7. When to Replace Instead of Repair
If the valve has:
- Severe corrosion that compromises structural integrity.
- Cracked or warped body that cannot be sealed.
- Irreparable seat damage causing persistent leaks.
- Excessive wear from long-term use.
In such cases, replacement is more cost-effective than repeated repairs.
---
8. Conclusion
Repairing a leaking gate valve requires careful diagnosis, the right tools, and proper techniques. Whether the issue is a stem leak, bonnet gasket failure, or seat damage, timely repairs can restore functionality and prevent further system damage. Regular maintenance and proper operation will minimize future leaks, ensuring efficient and long-lasting valve performance.
By following this guide, homeowners and technicians alike can effectively address gate valve leaks without unnecessary replacements, saving time and resources.
يستخدم هذا الموقع ملفات تعريف الارتباط لضمان حصولك على أفضل تجربة على موقعنا.


 هاتف
هاتف
تعليق
(0)